Showing posts with label Colette Patterns. Show all posts

Wednesday, September 7, 2016

Colette Patterns Rue Dress

Colette Patterns went back to their roots for this dress and I couldn't be happier about it! I like a two-hour sew as much as the next person, but it's so exciting and rewarding to tackle a bigger project.
I chose Version 1 but added the longer sleeves from Version 2.  I sew with a lot of prints, and the line drawings and examples for the launch made me think about stripes to start with. You can definitely go all out with prints, color blocking and piping for this one, but I also wanted to see what it looks like in a solid color without any flair to it.  It has a classic look to it, and I like that.
My fabric is a red wool crepe.  It's not great to be standing outside in Kansas humidity in a lined wool crepe dress! If you look closely at the pictures you can see that I'm actually starting to melt.  My measurements are 34-28-38.  Based on the sizing chart I initially chose a 2 in the bust graded to a 6 in the waist and hips.  The waist and hips were too big so I went with a straight 2 and it fits well. The bust was too roomy above the darts.  I pinned out what I didn't want, measured it (it was a 1/2 inch for me), made a straight line cut on the flat pattern, overlapped one side of the cut over the other 1/2 inch, and taped it..  I'm not sure if that's a legitimate way to adjust a pattern, but it worked for me. 

As usual, the directions are very clear and there are always online tutorials for the tricky stuff.  I appreciate the lining a lot on this dress.  I rarely do a lining unless the pattern calls for it.  If my main fabric is too thin I just underline it (maybe because I'm lazy?), but I do like the look of a lining.  I will be able to come back to these lining instructions for other projects. 

My lining is Cotton+Steel rayon.  It's a happy burst of color!
This dress is very versatile for warmer and also colder months.  My next version will most likely be in a floral print with piping, and I'm also wondering what it would look like if the bust piece was color blocked instead of the bottom bodice pieces.  So many ideas...so little time.
I received a copy of this pattern prior to it's release, but all opinions in this blog post are my own.  


Sunday, November 23, 2014

Colette Dahlia


Before I go any further I have to say that the wrinkle on my fabric from my seat belt is driving me CRAZY. 

This is the newest pattern from Colette Patterns.  I was working on my jeans when the pattern was released but I have a Colette addiction so I had to suspend work on the jeans to make this dress.
 
 
I am normally not a big fan of color blocking because it feels modern and I'm not drawn to modern looks.  I got the idea of making the bodice of the dress in a different fabric and couldn't let it go.  I made it in a non-modern print so the dress doesn't feel too modern to me.  I chose a Liberty print (another addiction) called the Margaret Annie.  I originally ordered the tan wool flannel for my Albion coat but it was too boring for that.  I didn't think I would ever use it but I like it for this dress.


My original plan was to make the bodice and sleeves from the Liberty print but I obviously just stuck with the bodice front and back.  I made all the bias tape out of the Liberty print and even went to the trouble of sewing it to the hem. I like hand sewing.


I underlined the Liberty in plain muslin.  For some reason I thought I didn't need to underline the wool flannel because it wouldn't be itchy.  It's not terrible but it would be better with an underlining.

I actually went to the trouble of measuring the pattern pieces against my own measurements.  Crazy concept, right?! My muslin fit without any adjustments (go figure).  The bust and sleeves are a 2 and I graded out to a 4 for the waist and skirt. 

The neckline fit seems to be a common issue.  There is gathering at the center of the neckline but my issue came at the shoulder.  Do you see how it sticks up? 

I thought it might just be an issue with my muslin fabric when I did my test garment.  I didn't sew the bias binding on my muslin and I also thought that might help it lay down.  It didn't.  On my actual garment I tried to fix it by gathering the shoulder a bit.  That ended up looking cheap.  Then I thought maybe a pleat might work but that looked weird and resulted in pulling along the shoulders and chest. On my third try, I added gathers on the Liberty fabric closer to the shoulders.  Also a no-go.  Gathers along the back didn't work either. I was way too lazy to sew on new sleeves, but I wonder if a solution to the problem might be to slash out a wedge at the center of the raglan sleeve which would make the sleeve more narrow.  Has anyone tried this? There is a sewalong going on right now.  I haven't read the posts but I hope the answer isn't in the sewalong and I just didn't read it!

Back to the jeans!

Thursday, October 16, 2014

Two Fall Monetas

I was gung-ho to start the Jean-ius course on Craftsy but hit a roadblock when I discovered I needed silk organza.  I'll have to order some so in the meantime I made two Monetas for fall.  A couple of years ago I saw a picture in a magazine of a woman wearing a knit dress, a cardigan and a scarf.  So cute and chic. I've tried to come up with a couple of "uniforms" for fall to keep myself focused and this is one of them.

I absolutely love this gray fabric I found at my local fabric store.  It is such a nice quality.  It was $16/yard which feels pricey when you're looking at the bolt but it's so much better to buy something high quality that wears well.  

My original intention was to make it with sleeves but at the last minute I left them off.  I'm going to see if I can get more wear out of a sleeveless top in a heavier fabric.  Maybe if I wear it with a heavy sweater, tights and boots I can wear it in the winter but also in the spring and fall with a lighter sweater.

This is my second Moneta with the Peter Pan collar (first one here). I thought maybe the previous material was to blame for the collar sticking up but I had the same issue with this material.  I've had a Bernina machine for a couple of year and would you believe that this is the first time I've used a decorative stitch? I used it to anchor the the collar to the dress. After I completed it I was sad I didn't think ahead and do some embroidery all over the collar.  Next time, I guess.

I only managed to get one decent picture of the second Moneta because my photographer/son was chomping at the bit to go out with his friends.  I had a few issues with this dress.  1) I know that I just said that I feel better when I buy higher quality fabrics.  I didn't follow my own advice on this one.  I ordered this online.  I was so in love with the idea of polka dots but the quality is just not great. It's thin and flimsy. 2)  I made the version that doesn't have a lined bodice.  Since I was going to use a twin needle around the neckline I decided to reinforce it with knit interfacing.  Disaster! The fabric stretched and curled so bad that I won't be wearing this one without a scarf.  3) I use the XS bodice graded out to a small at the waist.  I figured the XS sleeves would fit snugly around my biceps but they were very baggy.  I went back and used a much bigger seam allowance but I'll have to fix the pattern piece.

Tuesday, July 22, 2014

Colette Myrtle

 
This is the newest Colette Patterns release called Myrtle.  I bought it before it was released during a promotion.  I wish they would put me on a list of people who buy every one of their patterns so they could just mail it to me without asking if I want it.  Of course I do.
 
I've decided to call this a wearable muslin so I'll feel better about the extremely poor workmanship.  It's an incredibly easy pattern to follow but I decided to make it more challenging for myself by making some really goofy mistakes.  Also, after an incredibly mild summer in the Midwest, it decided to be 100 degrees today and I'm pouty about it so there are going to be two pictures of me in this dress.  And both of them include not-so-great-looking hair. 
 
There are 5 pattern pieces to this dress: Bodice front, bodice back, skirt front, skirt back and pocket.  The back bodice is finished with a twin needle (unless you have an overlocker).  I usually don't have an issue with the twin needle.  I bought this fabric on the clearance rack and it is super flimsy.  The twin needle ate it up but somehow I made it through.  I just hope no one ever inspects it closely. 
 
There are some nifty little sewing tricks in this pattern that I liked.  The front bodice is a very long piece that you fold in half to make the cowl neck.  Then you sandwich the back bodice in between the layers and stitch the shoulder and side seams.  Super easy! Unless, of course, you get the back bodice twisted around like me and have to pick out the serged seam.
 
To insert the elastic in the waistband, you sew two rows of stitching at the waistband to form a flap and then fold it over the elastic and sew to enclose it.  Easy!
 
 
The picture in the instructions clearly shows that you are supposed to pull the bodice out of the skirt to enclose the elastic.  I missed that part and sewed it while the bodice was tucked inside the skirt.  I'm almost positive that it took me longer to unpick the zigzag stitch around the waistband than it did to sew the entire dress.  It took that long. 
 
The part I'm going to have to change is the neckline.  I made an XS for the top and graded out to a S for the waist and skirt.  I'm going to take out a rather large wedge from the front bodice pattern piece because it dips so low on me that it's obscene without a cami underneath.  This probably isn't a problem for a bustier gal but busty I am not. 


I could probably live in Myrtles and Monetas all summer long.  

Saturday, July 19, 2014

Colette Parfait #2

 
This is my second Colette Parfait (see the first one here) of the season and my favorite of the two.  I used this Liberty of London fabric as a lining for my Colette Albion.  I loved it so much I wanted to make a dress out of it.  It disappeared from the www.fabric.com website for a little bit but once it reappeared I snatched it up. 


I underlined my last Parfait with muslin but I chose a white batiste for this one. I found it at a big box store and was pleasantly surprised by how much I like it.  And the price!


I think I'm going to make a winter version of this dress in a red wool crepe and wear it over a shirt.  I hadn't thought about it as a winter dress until I read the packaging.  I think the pockets are darling but you can't really see them in the busy prints I've chosen.  Maybe I'll find some way to bedazzle them in a solid color fabric.

I like the back of the dress a lot.

 
I'm pleasantly surprised by how often I've been wearing the dresses I've made this summer. I feel like my productivity rate is the highest it's ever been.  That must have something to do with the fact that I'm making more than one version of each pattern and therefore don't have to fool around with fitting issues.


Friday, May 30, 2014

Colette Moneta


I love, love, love the Moneta from Colette Patterns! I purchased both the Moneta and Mabel (which I will not be making as a mini skirt in case you're wondering) plus The Colette Guide to Sewing Knits during the pre-sale which meant I didn't know what patterns I was buying.  So risky but turned out so well! It's a great every-day dress for my lifestyle.  I look more put together than shorts and a shirt but I'm still super comfortable which was the point of my RTW fast.
 
I used a Liberty of London Dufour jersey knit called Gleason from www.fabric.com but it's gone now.  Those Liberty prints are so pricey but so worth it.  It almost feels a little silky and sews up very well.  A standard adjustment for me is lengthening the bodice by an inch because I have a long torso and adding length to the skirt because I generally try to avoid the awkward maneuvering you have to do in a shorter skirt with kids and living life in general.  I did both of those adjustments but the bodice turned out too long and I serged inches off the skirt to get it to hit me at the knee. I don't feel uncomfortable in it but I will take away that inch in the bodice next time.
 
 
I went with the standard collar even though the pattern comes with 5 free downloadable collar variations.  I've never sewn sleeves by reaching between the bodice and lining before.  I liked the finish and will do that again.
 
I didn't realize until too late that the belt is way too big.  That's why I'm holding it with my finger in previous pictures.  It does allow you to see the gathering at the waistline in this picture though:
 
 
The dress is extremely easy to sew but gathering the skirt with the elastic did give me a second of trouble.  It went smoothly after I got the hang of it.  I had to stitch it down every few inches to keep things stable while I stretched the elastic.  Stretching the elastic while trying to keep it at the edge of the fabric for long stretches was too hard. 


I think I've found a wardrobe staple! It makes me laugh that I used to think knits were super hard.  This is my second knit garment and I'm in love.


Monday, March 3, 2014

Colette Albion


 Disclaimer: I'm pretty sure they don't teach any of the techniques discussed here in sewing school. 
 
Ahhh, the Colette Albion.  As my husband said last night, sewing this coat was an emotional roller coaster ride for me.  And for him.  I won't lie.  At one point he asked me why I was staring off into space at the dinner table and I said, "Oh I'm just thinking about what to do about that damn coat."  I don't want to ask him how many times I walked into the living room and said, "I hate this coat! It's terrible!" and then walked back into the same living room the next day and said, "I think I'm really going to like my new coat."
 
I initially wasn't going to buy the Albion pattern.  Even though I spend a lot of time in the woods with my kids and the pattern launch was very woodsy, I know from experience that I really don't care for unisex styles.  However, I do love Colette contests (and their patterns, and their blog, and their new sewalongs website, their e-books and pretty much anything else having to do with Colette patterns because that's how I've been learning to sew!).  I went foraging for inspiration on Pinterest and came across this little number.  Could I attempt to copy a $995 Burberry duffel coat?  Sure I could.  Even if it meant sewing multiple extra seams.  Plus I discovered with my Hawthorn that I really like to copycat things I see on the internet. 
 
I ordered a toffee wool flannel from Mood but when it arrived it was very beige-y and I wasn't in love with it.  Enter the burnt orange fabric you see in the above picture. 


I purchased this fabric 2 years ago (I think) during a serious fabric buying binge at Kaplan's Fabrics.  Sadly, they just went out of business.  It is the most lovely shade of burnt orange and is very thick but also pretty drapey.  I don't know what kind of wool it is but it feels almost like velvet.  Does anyone know?  It was extremely expensive and luxurious and I was afraid to use it.  I would unfold it to pet it occasionally, but that's as far as I got.  When I was searching Mood for a different fabric, the orange on my shelf caught my eye and I decided to go with it.
 
I made four muslins.  Let me say that again: I made four muslins.  You get one sideways picture of my initial muslin because I cannot figure out how to make it turn.  As for the subsequent muslins, there are no pictures and it's probably better that way.  I'm not sure I want to re-live all of that.
 
My first muslin was the XS with no alterations.  It was much bigger than I thought it would be and that's when I got a little scared.  Modifications to a pattern are not my strong suit.


I had a terrible time figuring out the zipper on my initial muslin.  The part that threw me was how the left side of the zipper is exposed on the left panel.  That's where the Sewalongs site was so helpful.  You ask and someone answers! After my initial muslin, I took 1.5 inches off the waist on my pattern piece and did a narrow shoulder adjustment of about an inch and a 1/4.  I also attempted to take quite a bit off the sleeves using the adjustment method outlined in the Albion e-book.  Ouch that was hard.  More on my solution to that later.
 
For my second muslin, I sewed up the alterations I made to the initial one.  The waist was suitable but the sleeves were a mess and the back was too roomy. 
 
For my third muslin, I cut the seams for the front top panel, the waist seams and the seams for the back panels as well as another shot at the sleeves.  I'm not sure if you are supposed to follow some logic to making seams in a pattern where there aren't any, but I chose to just cut into my pattern pieces where I thought it looked nice and add a 5/8 seam allowance to each piece.  Worked for me!  For the billowy back part, I graded in the center piece to about 3/4 of an inch at the waistline because there was going to be a seam there anyway.  Had there not been a seam I suppose I would have had to do a swayback adjustment. 
 
As for the sleeves, I read somewhere on the internet that if you're having trouble with sleeves you should use the sleeves from another pattern that you like as a reference.  Instead of using them as a reference, I decided to just substitute the sleeve pattern pieces from another pattern.  Which pattern?  My Anise, of course.  I LOVE that pattern.  Are you supposed to do that?  I'm sure there's probably something technically wrong with how they set in comparison to the rest of the coat but, again, it worked for me and I'm pleased with the outcome.  I lifted the underarm on the Albion pattern by an inch and the Anise sleeves set in there just fine.  The fourth muslin was only for the sleeves. 
 
After four muslins I decided that any further adjustments would have to be done when I was sewing it.  Four was quite enough.  The only thing I ended up doing was starting the grading on the waist an inch under my armole.  When I graded in the waist only the sides near my chest were just too big.


I like how the seams jazz up the back.  I also think the front seam makes it look like a dressier jacket.


When I sewed with the fashion fabric, I decided that I wanted to install the zipper between the front panel and the facing.  I used this tutorial posted on the Sewalongs site.  http://www.jane-sews.com/2014/02/albion-zipper-tutorial.html. It's a great tutorial. Unfortunately, I did not factor in that moving my zipper meant I would have way over an inch of space across my chest.  When I tried it on after sewing it all together it was very big across the chest.  After despairing for an hour about how my coat was ruined and my husband gently trying to talk me into giving it all up so I could get on with my life, I decided to rip the left zipper out and sew it to the outside of the left panel like it says in the Albion e-book.  I initially thought I would care that it was exposed. If you are worried about that look, I can tell you that I've worn the coat multiple times and it's a non-issue.  You really can't see it when it's zipped and the toggles are buttoned.  The toggles are from Dritz in brown and I bought them online from www.CreateForLess.com


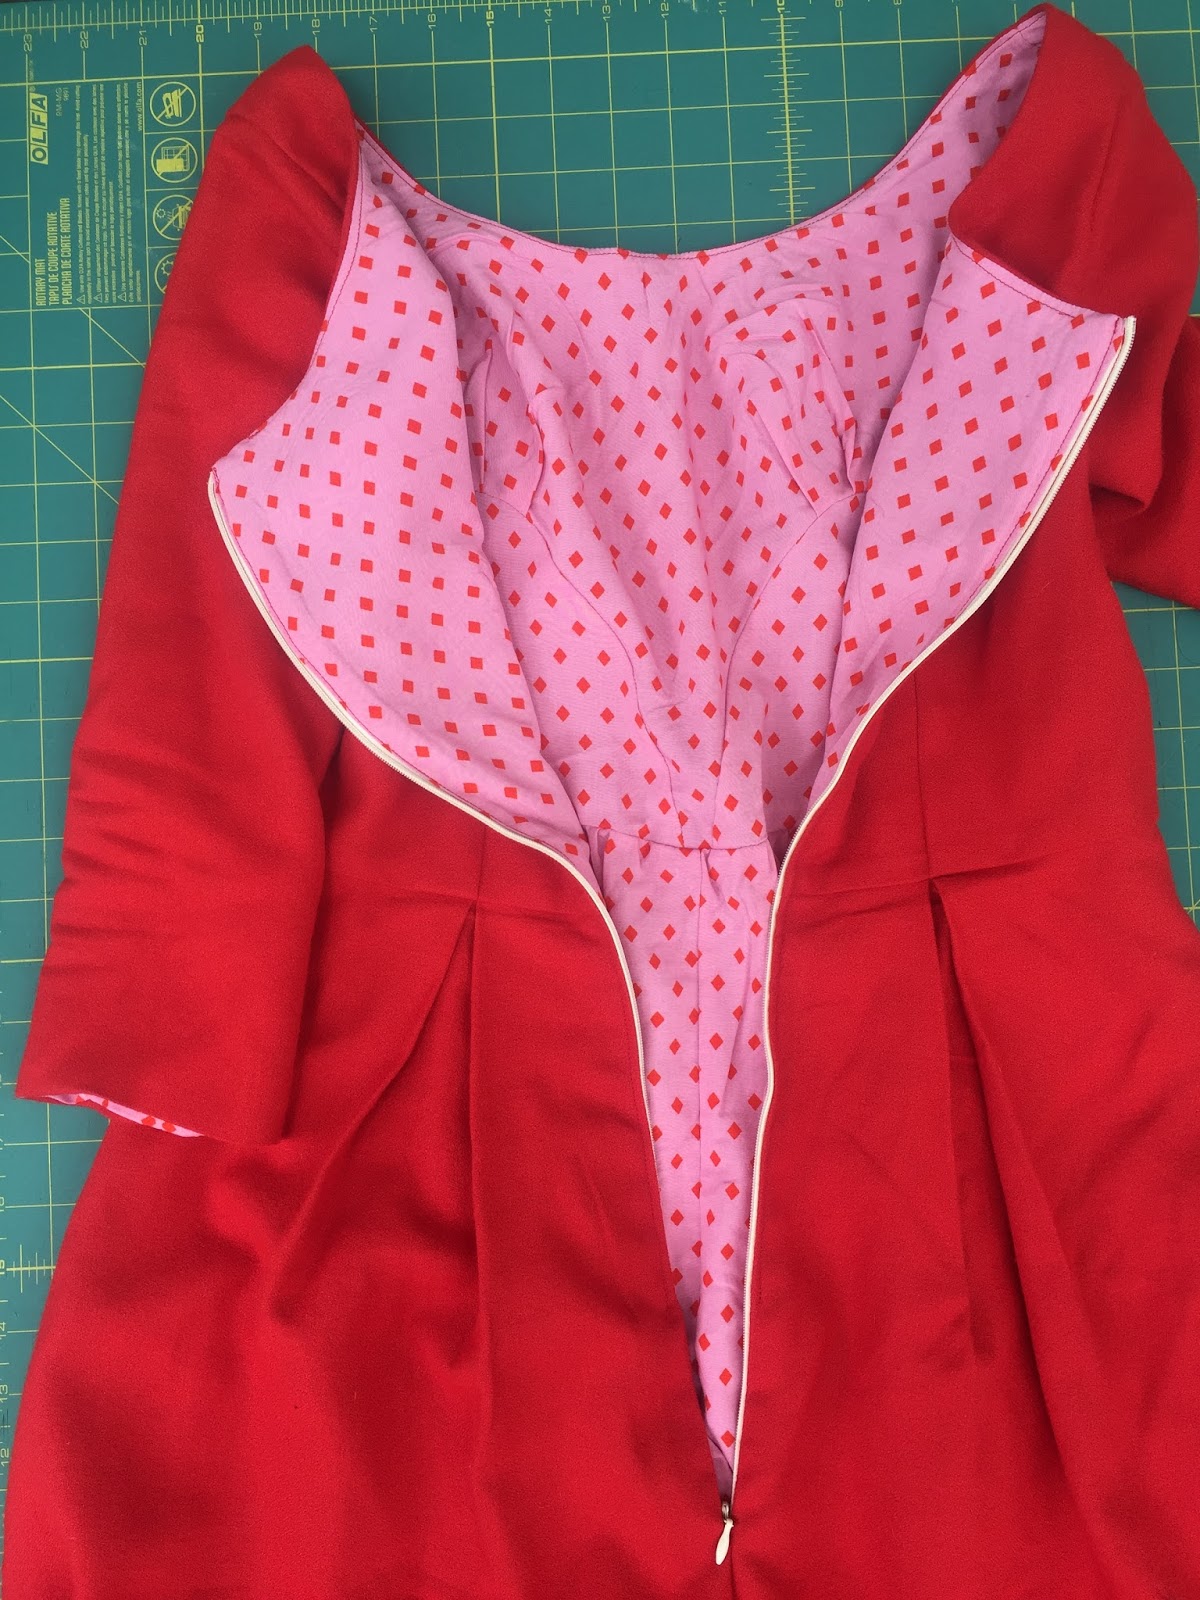
I don't plan to walk around with my coat unzipped much either.  This is what it looks like open:


Since my coat is form fitting, I didn't want a flannel lining because I thought it would catch on my pants.  I opted to go for a Liberty of London tana lawn for my lining fabric.  The pattern matched the orange so well I couldn't resist. I would love to order more of the print and use it for a dress.  It's really sweet.
 
 
I opted not to sew on the hood closure.  I'm not sure how much I'll use my hood since I like to wear a hat and I didn't want the tab flopping around.
 
 
The buttons:


This is what my photo shoots really look like:


It is just so COLD.  And speaking of cold, I became obsessed with the fact that my toggles were crooked in my initial photographs so I made my oldest son venture out in THREE degree weather to take pictures of the toggles fastened straight.  Do I look cold?  Because I am.


In the end, I'm pleased with my coat.  It was a beast of a project but I like how it turned out. Wish me luck in the contest!


Friday, January 24, 2014

Colette Anise #2


This is my second go-round with the Colette Anise.  The first one I made last year in corduroy.  It was a strange fabric choice for this jacket but the salesperson at the shop assured me it would be OK.  I don't hate that one, but I like this one much better.  I bought the Anise Companion which makes sewing this jacket very easy.  It gives you a day-by-day plan to finish your jacket in 8 days.  I decided to take 22 days instead.

My parents take each grandkid on a trip after they graduate 8th grade for a treat.  My son and my niece both graduated this year so they planned their trip together to Los Angeles.  I invited myself along and the kids graciously allowed me to stop by Mood LA.  I read reviews on-line that the employees are not so nice, but my experience could not have been more enjoyable.  That probably had something to do with Jose Manuel Gonzales.  He was the nicest salesperson EVER. Ask for him if you go there.  He also teaches classes.  By the way, this was about as well behaved as my son and niece were in the store.  However, it's one of my favorite pictures from our trip.


I knew I would be overwhelmed by the fabric choices so I went with a list.  Written at the top was "Teal wool = Anise?"  The minute I stepped in the aisle I saw the bolt and loved it.  The $35/yard price tag initially did not love me back.  I can't remember the designer (Carolina Herrera maybe?) but it's a wool/cashmere blend.  I walked around the store trying to decide if I should purchase it or not.  Obviously it came home with me on the plane!  I'm glad it did.  Fabric matters.


Since I forked over major bucks for the main fabric I was shy about purchasing another expensive fabric for the lining.  Jose found this polyester blend and I love how they look together.  I am a little nervous about how the polyester will handle dry cleaning.  I might not be opening my jacket in public.

I did a swayback adjustment on my initial Anise last year.  I have a long torso and the first one is too short.  I kept the same pattern pieces for this version but I added 2 inches of length.  I don't know if you are supposed to do that after you do a swayback adjustment, but it worked for me.


I did bound buttonholes for all 8 buttons. 


I made my own covered buttons.  It could not have been easier and I will do it again for other projects.  I used the Dritz kit that I found at Hancocks.  I initially wanted to use the wool to make the buttons but it is way too thick.  I was going to opt for a teal cotton from my stash that was suitable.  The day I was going to make the buttons I went to my local Bernina dealer to buy a ruffle foot for the 2nd or 3rd project in my queue.  Fat quarters of teal silk were in a basket by the register and they turned out to be a perfect fit. 
 
This jacket was definitely an investment in time and money but I'm going to wear it for a long time!