Showing posts with label Sewaholic Granville. Show all posts

Sunday, January 31, 2016

SBCC Brooklyn Hoodie

This is a new pattern company for me and I enjoyed my first time sewing with them.  Skinny Bitch Curvy Chick Patterns recently released the Brooklyn Hoodie and I jumped on that bandwagon because my hoodie situation is sad.  There is a sewalong that goes along with it that was helpful, but the instructions are clear enough that you can do it without the sewalong. 
This was my first time sewing with french terry.  It's always fun to try something you've never had experience with before.  I ordered this fabric (and the fabric for what is going to be my last Granville this season at the end of this post) from Hell Gate Fabrics, which is new on the scene.  I enjoyed my shopping experience, and would recommend it to others.  I love independent pattern companies and fabric suppliers because they are so accessible.  The shipping is quick, and she even refunds your change on shipping if it comes under what she quoted. 
The quality is very nice and also very warm.  The sewalong gives some nice tips for this material.  I chose size small and if I had to do it over again I would have gone down a size just for this material.  It steams back into shape really well, but it's very stretchy as you wear it.
I attempted to sew twill tape along the hood seam and that proved to be a disaster.  I didn't like how it looked so I ripped it out and tore some big holes in my fabric while I was at it.  I sewed the hood seam again to encase those holes in my serger thread.  That little remnant of twill tape is staying put!
 
And here's my last Granville until next fall/winter.  This is a Japanese print from Hell Gate Fabrics and I had to have it because it was so unique.  I like to look in my closet and see four handmade button ups in happy prints. 

Saturday, April 11, 2015

Sewaholic Granville #2

I tried to switch up my photo location by standing in front of a barn in the haze and wind.  I think I might just stick to my little wall from now on.  It never lets me down.

I had to squeeze in one last Granville before I start warm weather sewing. I don't have anything new to add, except saying that I don't think I'll get tired of making these or wearing them.   I love a gray/mustard combination in just about anything.  This was supposed to be a nice relaxing sew after my Pavot coat that took an entire month to complete, but I got compulsive about sewing over the last couple of days and stayed up way too late finishing. 

I did two new things with this version: tailors tacks on the bust darts and flat-felling the arm seam.  I think tailors tacks are probably most accurate, but I think I've decided I like drawing on my dart lines better because it gives me a line to follow.  And I had no idea how fiddly the flat-fell seam is on an armhole.  Is it just me or does that take forever? Was I just impatient?
As you can tell, I still have swayback issues which is extra sad because I did a swayback adjustment to the pattern (or so I thought).  I know the point of sewing your own clothes is to get a great fit but I was too lazy to try to fix it for this shirt.  Next time?  Or maybe never? Only time will tell.


The fabric is another Liberty print that I've been hoarding for several months.  The purpose of these next photos is to show my attempt at pattern matching on the pocket flaps.  It's not perfect but I'm satisfied with it.  May and Patrick are always talking about that on The Great British Sewing Bee and so I thought I should give it a go instead of slapping a pocket flap on there and hoping for the best. (***As an aside, I couldn't figure out how people were watching TGBSB season 2 because I couldn't find it when I searched YouTube on my laptop.  I noticed other people struggling as well. Then I thought to use my phone and there it was! Is that a browser issue? I don't know the lingo but help spread the word!)

When I uploaded these pictures I realized they highlighted an issue I had with this fabric.  If you look closely at the stitch lines you can see little loops.  Those don't normally occur with other fabrics.  Does anyone have ideas on why that might be occurring? I messed with tension and inserted a new needle with no luck.  I sew with a Bernina.

Sunday, March 1, 2015

Sewaholic Granville

 
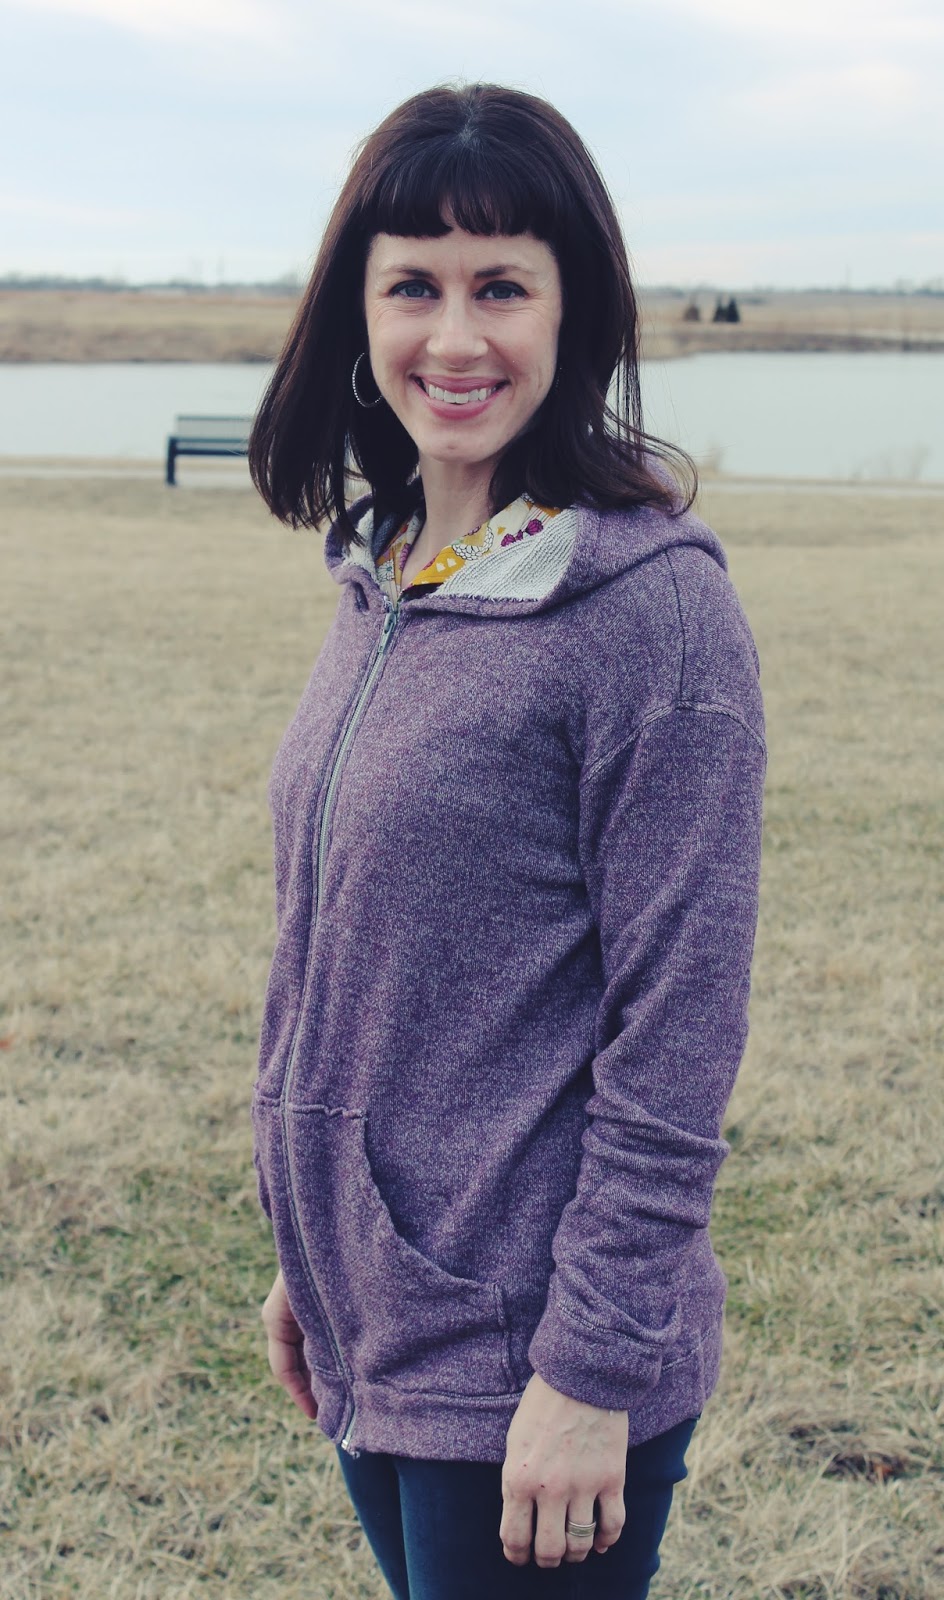
After a particularly bad experience with the Papercut Rigel Bomber in January and some of February (which I'm choosing not to talk about in an attempt to forget it happened), I really needed a successful make.  The Sewaholic Granville shirt is my first time ever making a button up shirt with a collar and collar stand and I was surprised by how much I enjoyed it.  There's just something rewarding about working through all of the different steps. If you're contemplating making the Sewaholic Granville shirt but haven't yet, get to it.  You won't be disappointed.  Believe the hype because it's a great pattern.

I made a muslin with a size 6 in the shoulders and grading down to a 0 right under the bust darts because I'm not a pear shape. My next step was to make what was supposed to be a wearable muslin out of a fabric that I absolutely had to have a year ago and recently decided I didn't like all that much.  I thought the 6 was just a tad too big in the shoulders so I went with the 4 instead.  I had a very hard time conceptualizing the collar and collar stand based on the pattern instructions, and consequently ended up destroying that part of the shirt.  If you get nothing else out of this post, get this: I strongly recommend buying 
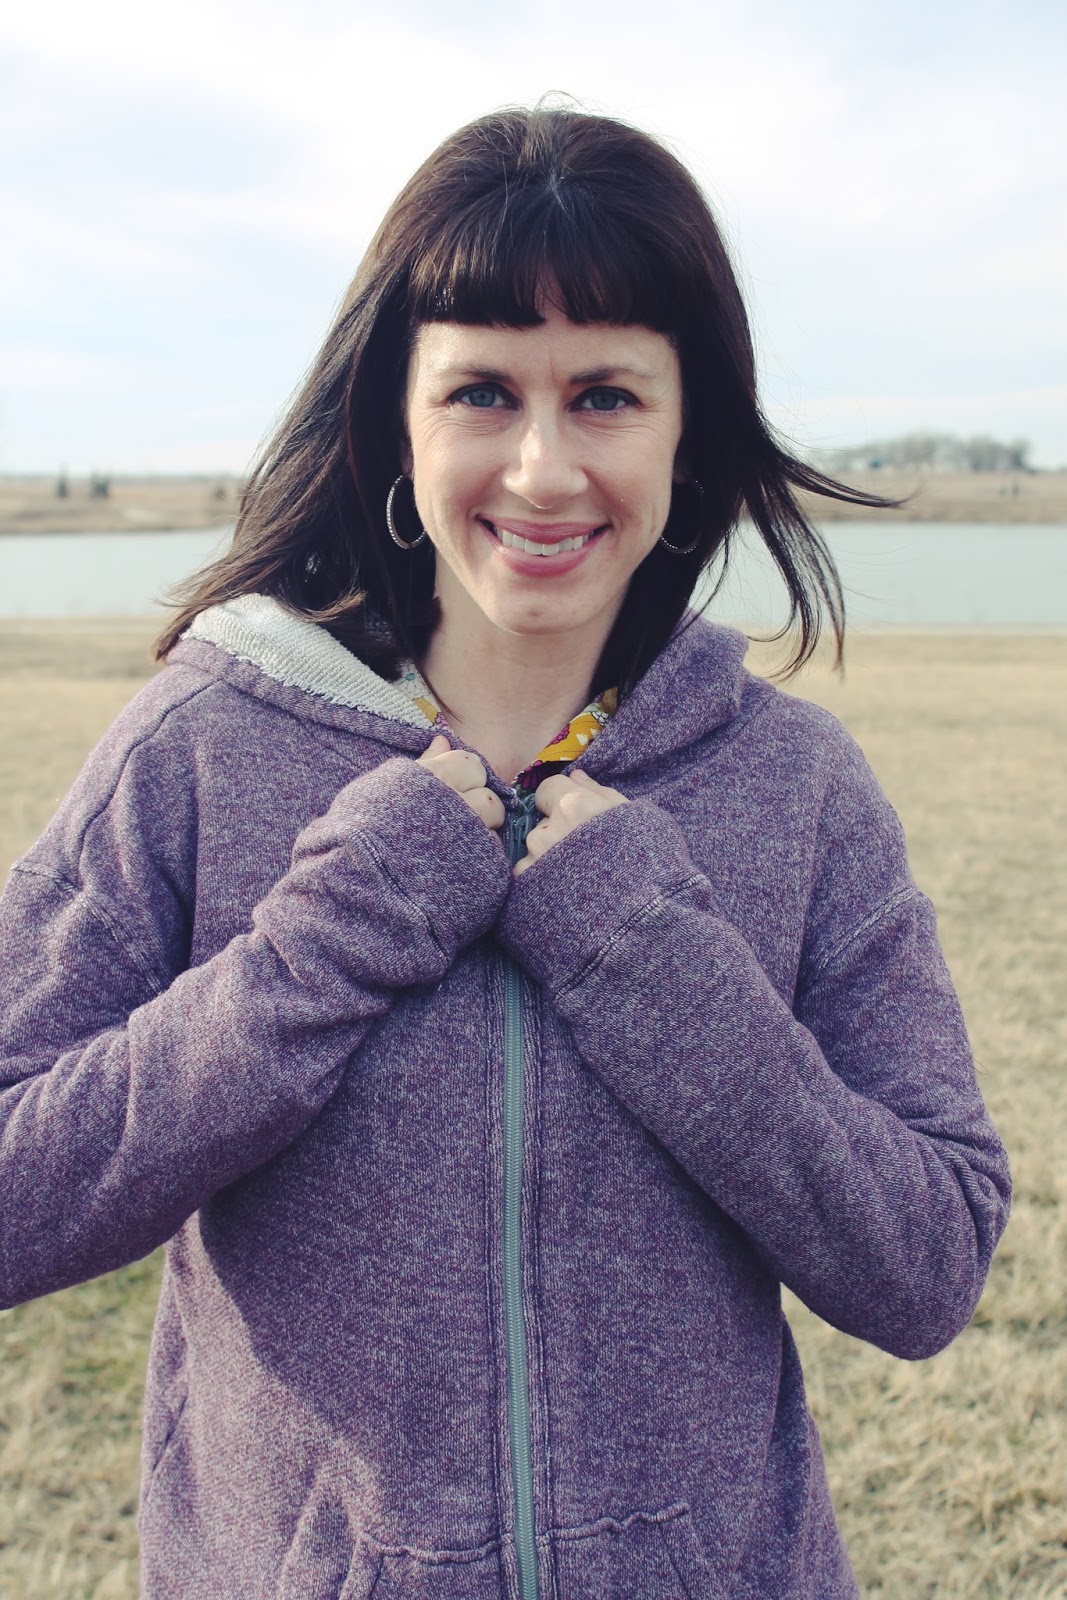
Pam Howard's The Classic Tailored Shirt on Craftsy or consulting some other resource that walks you through sewing the collar and stand together as one unit before attaching it to the shirt.  The Granville Pattern instructions don't do this and it's pretty confusing if it's your first time.  Two different ladies from the RTW Fast on Goodbye Valentino suggested the Craftsy course and I can't recommend it enough, especially for beginners.  I was a little concerned when I noticed the segment for the collar was an hour long, but she is one of those instructors that makes it all seem so easy.  The Sewaholic website has several posts on sewing a collar as one unit, but the fabric used is so busy that I had a hard time figuring out what she was doing.  Buy the class!

My fabric is also busy so it's hard to tell what's happening but my collar and stand turned out crisp and neat and made me very happy. 

Sewing on buttons has not been my strong suit even though it seems like that should be the easiest part.  I end up sewing them in the wrong place a lot and then the shirt looks ill-made.  The Craftsy course gives good pointers on that as well and I had no issues with it this time. 

I skipped the beginning segments and went right to the collar portion because I had already completed the shirt up to that point.  I look forward to going back and watching them for my next Granville.  I also didn't watch the portion on sewing in the sleeves until I had already sewn my side seams with French seams.  Pam Howard sews her sleeves onto the shirt without sewing the side seam or sleeve seams first.  I had to set mine in in-the-round.  Which version do you use? Does it make a difference?  I would obviously prefer to do it her way because it seems easier.  Next time!

My wearable muslin had excessive fabric at the lower back.  Swayback adjustments are common for me.  I thought I fixed it with this version but there is still excess fabric back there.  I need to work on that.

I could not figure out how to do the sleeve plackets on my Oakridge blouse.  The Classic Tailored Shirt from Craftsy uses a sleeve placket similar to the Oakridge blouse so I can reference that next time.  I was able to follow the pattern instructions for this shirt.  They look OK but you'll notice I sewed down further in the final step on my left sleeve as opposed to my right.  Just another thing to perfect for next time!
 
This is definitely a shirt that will become a wardrobe staple.  I know many people frown upon quilting cottons for apparel.  I don't use them myself, but does anybody use nice quality quilting cottons for a shirt like this?  I know it's an endless debate but I'm curious what the thoughts are for a button-up shirt.